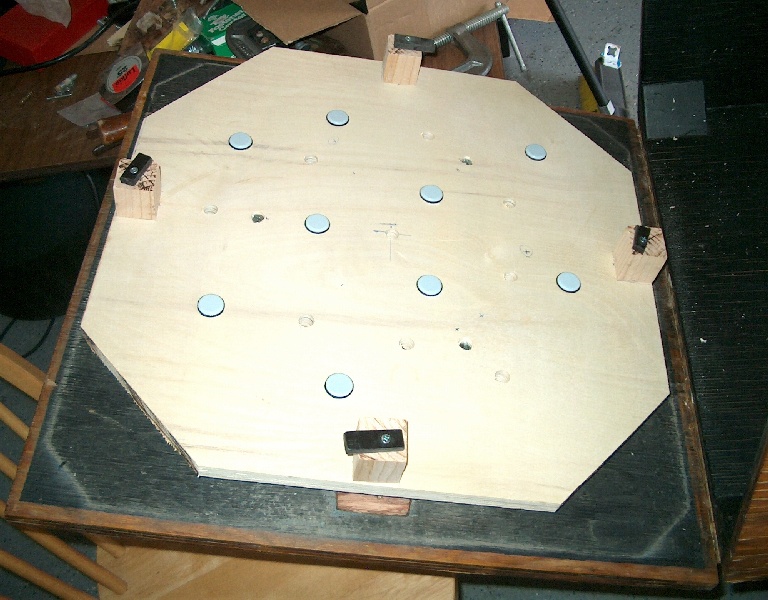
I mentioned that there was still some work to do on Big Bertha--a bit more than I first expected. As I mentioned (I think), I created a full flotation mirror cell that sits on three 3" 1/4-20 machine screws, with 28 pound springs between the back of the mirror box door and the 1/2" plywood octagon that holds the mirror. Today I added nine 1" diameter furniture glides to provide an airspace between the board and the mirror (thus improving cooling). But where to put those nine supports?
There's a program called Plop located here that uses rather sophisticated techniques to calculate optimum location based on the mirror material, diameter, focal length, number of supports, etc. Of course, all that precision runs into the problem of how accurately I can measure the location of where to put the supports, but it is still better to be off 5% from perfect, than to just guess, and probably not be even close. If it looks like one of the supports isn't quite right, you are probably correct. I suspect that relative to the precision of the mirror and other parts, this is probably the least of my problems. "Measure with micrometer. Mark with chalk. Cut with axe."
Here's the front of the cell, with additional airspace and lightening holes drilled through using a 1.25" wood boring bit. (And yes, it lightened it enough to solve the slight balance problem that the more sophisticated cell had introduced.)
Here's the back of the mirror box assembly, pretty much as it arrived. The difference is that the 1/4-20 screws now use wingnuts for adjustment.
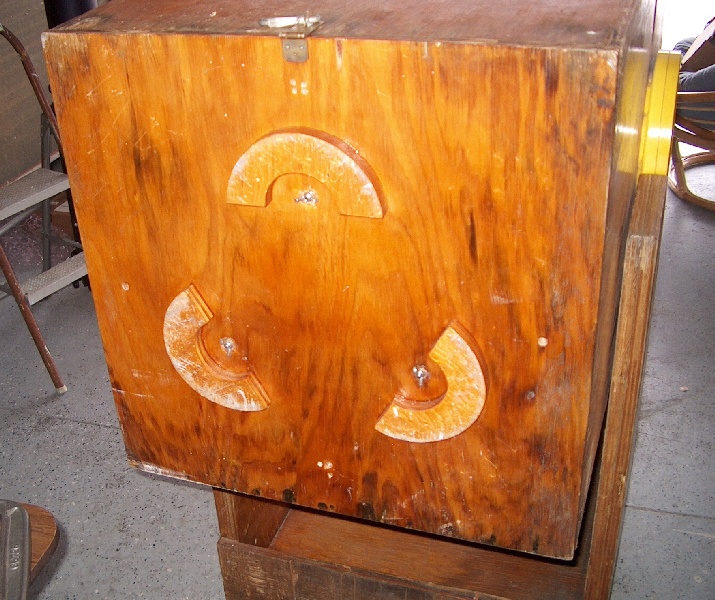
As you can see, what was actually a pretty nice piece of wood has some water damage. If the optics turn out to be really decent, I'll probably spend some time refinishing the wood, and replacing some parts lower down in the cradle that were much more seriously damaged.
Here's the latch that holds the mirror box in place--and it is a far less precise result than I would prefer.

I'll probably replace that at some point with something more repeatable. The problem here is that depending on position, you can get perhaps 1/10th of an inch more opening in some positions than others, and that is going to affect collimation pretty substantially. Over a common range of angles, it won't be that dramatic, but from vertical to horizontal it will be substantial.
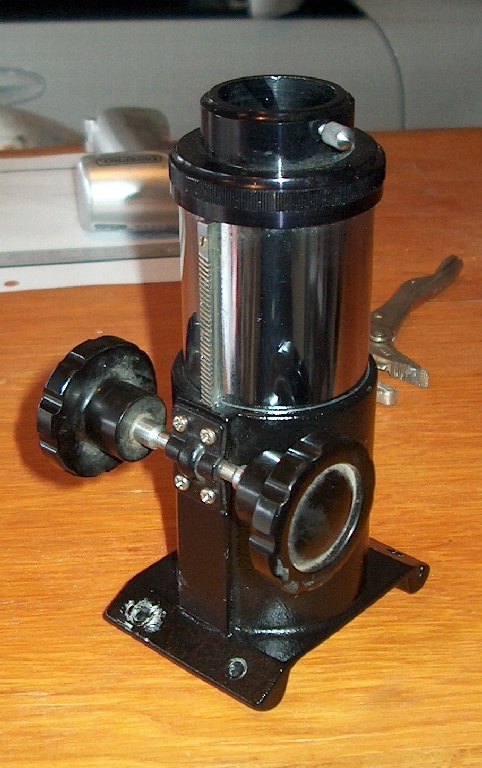
The next step was the focuser. I didn't even need my combination square to see that the focuser wasn't square to the tube and, presumably, not square to the optical axis of the telescope. In addition, the focuser was stiff and cranky, which I suspected was dirt, oil, and sludge in the gears, so I removed it.
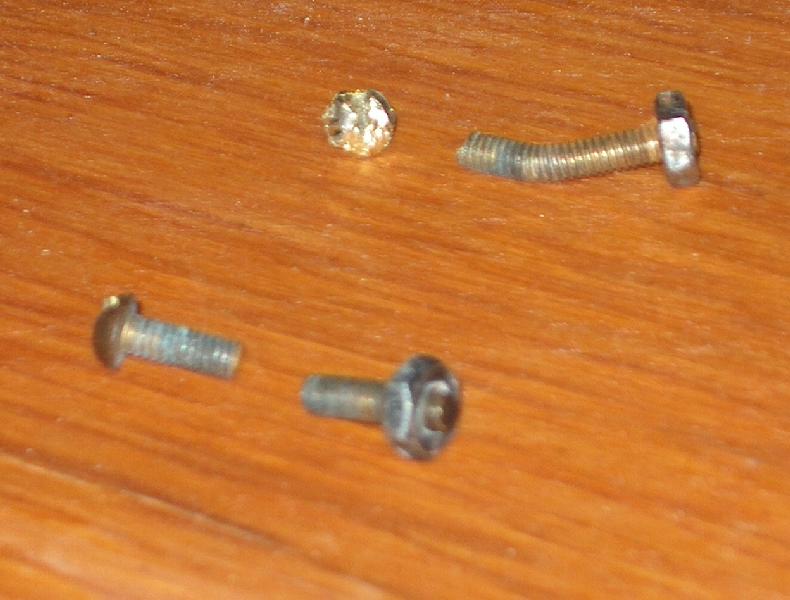
If you keep a kosher kitchen, you don't use the same dishes for meat and for milk. You should take the same approach to mixing metals in fasteners. Whoever built this made such nice woodwork, but then combined brass screws with zinc coated steel nuts. In the presence of water, this makes a battery, and corrosion. Two of the four screws put up a fight, but eventually came loose. Another one broke in half, and the last had to be removed by the brutal technique of worrying the head off the brass screw with Vise Grips. This has all the subtlety and finesse of stopping a robbery with a hand grenade.
The focuser itself seems to be an older University Optics 2" unit made in Japan. You change it to 1.25" not by putting in an adapter, but by removing the 2" collar and replacing it with a 1.25" collar that screws onto the chrome barrel. Unfortunately, this 1.25" collar, once removed, would not screw back on to the chrome barrel. Careful examination revealed that while the threads were fine, the 1.25" collar had apparently been dropped onto a very hard surface, and was bent on its side, in the threaded area. This was easily fixed by taking a Vise Grip, using the minimum force to get a good grip on the bent side, and twisting slightly. Now it screws on and off like it was new.
I removed the four screws holding the pinion assembly onto the rack, and then removed the tube to which the rack is attached. The gearing was dirty, but some BreakFree cleaned it up nicely. Still, the tube slid in and out of the housing with some effort, especially at the innermost travel. I polished the inside of the housing, used a little BreakFree there--now it isn't quite as smooth and slick as a Moonlight Accessories Crayford focuser, but it is pretty darn good. There's a very, very slight amount of backlash at some points in its travel--if you are looking for it. Of course, after reassembly, adjusting the tension of the four screws is essential to get this feeling silky smooth.
Reinstalling the focuser, I used 8-32 1.5" long stainless steel screws, washers, lock washers, and nuts. The previous design used only nuts on the inside of the tube, which meant that because the tube is Sonotube, the nuts had buried themselves into the material. Using washers prevents this; lock washers keeps them from getting loose; using all stainless steel dramatically reduces the risk of corrosion. These screws are longer than the 3/4" screws that were in there before, but then again, I can remove these if I need to do so later.
Also, I needed somewhat longer screws on at least one side to correct the out of square condition. I did this by adding three washers between the base of the focuser and the tube on the two screw holes closer to the mirror. This means that the focuser is now so close to optically square that I can't quite persuade myself that I have gone too far the other way.
I washed the mirror one more time, and the found the exact center of the mirror. Traditionally I have center dotted my mirrors with a single drop of garish red nail polish, but since I no longer have a teenaged girl living in the house--and my wife's tastes are a bit too mature for anything garish--I had to pick the better solution, which is a white notebook paper reinforcing ring. This gives you a target where if your laser beam doesn't hit dead on, it is obvious. Unfortunately, Target only had these in packs of 544, so I will be able to center dot 543 more mirrors, no problem!
Here's the mirror, with the center dot (just barely visible):
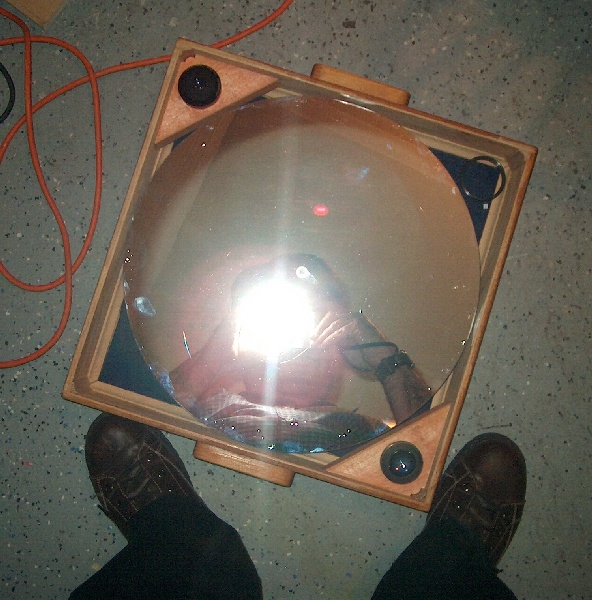
You can also see the nicely fitted box that the mirror was stored in when I received it, as well as the two eyepieces that came with it. One is a University Optics 18mm Orthoscopic in 2" diameter--which is rather unusual. The other looks like some sort of military surplus eyepiece, apparently about 35mm or 40mm focal length.
I finished reassembling everyhing, then pulled out the laser collimator. Everything came together much more quickly this time, and I suspect, when it stops raining, that the images will be much better.
Now that the primary and diagonal mirrors are clean (and the cobwebs are removed from the focuser), I needed to keep it covered. I couldn't find a spare 35mm film canister for the focuser, so I put a Glad Bag over it. A Hefty Leaf & Lawn bag just barely fit over the front of the tube, but most of the bag droops down. My wife took one look at this loose and droopy cover, and asked, "Are you trying to prevent it from reproducing?"
The next step, if the lawn ever dries, will be remove all the glass, and spray paint the inside flat black to reduce internal reflections.
No comments:
Post a Comment